Ragi Flour: A Nutrient Packed Ancient Grain for Modern Health

Ragi Flour: A NutrientPacked Ancient Grain for Modern Health Ragi flour, also known as finger millet flour, is an ancient grain that has been a staple in traditional diets, particularly in India and Africa, for thousands of years. This humble grain is making a comeback in modern kitchens, thanks to its impressive nutritional profile and versatility in cooking. As more people seek healthier and more sustainable food options, ragi flour is emerging as a superfood that deserves a place in your pantry. Nutritional Powerhouse Ragi flour is celebrated for its high nutritional content. It is rich in essential nutrients like calcium, iron, protein, and dietary fiber. One of the most significant benefits of ragi is its high calcium content, making it an excellent option for maintaining bone health, especially for those who are lactose intolerant or prefer plantbased diets. In fact, ragi contains more calcium than most other grains, making it a valuable food for children, pregnant women, and the elderly. In addition to calcium, ragi is packed with iron, which is crucial for preventing anemia and maintaining healthy blood levels. The grain is also a good source of protein, which is essential for muscle repair and overall growth, especially for vegetarians who may struggle to meet their protein needs through diet alone. Ragi flour is also glutenfree, making it a great alternative for those with gluten intolerance or celiac disease. Its high fiber content aids in digestion, promotes a feeling of fullness, and helps in managing weight. The slowdigesting carbohydrates in ragi make it a great choice for diabetics as it helps regulate blood sugar levels, preventing spikes after meals. Culinary Versatility One of the reasons ragi flour is gaining popularity is its versatility in cooking. It can be used in a wide range of dishes, from traditional recipes to modern creations. In India, ragi is often used to make rotis (flatbreads), dosas (savory pancakes), and porridge. Ragi porridge, known as ragi malt, is a popular breakfast option, especially for babies and young children, due to its easy digestibility and high nutrient content. Ragi Flour Pizza Recipe Ragi flour, or finger millet flour, is a nutritious alternative to traditional wheat flour, and it can be used to make a delicious and healthy pizza. Here’s a stepbystep guide to making a ragi flour pizza from scratch. Ingredients For the Pizza Dough: 1 cup ragi flour 1/2 cup whole wheat flour (optional for added texture) 1 tsp instant yeast 1 tsp sugar 1/2 tsp salt 1 tbsp olive oil 1/2 cup warm water (adjust as needed) For the Pizza Sauce: 1/2 cup tomato puree 1 garlic clove, minced 1 tsp olive oil 1/2 tsp dried oregano 1/2 tsp dried basil Salt and pepper to taste For the Toppings: 1 cup mozzarella cheese (or any preferred cheese) 1/2 cup sliced bell peppers 1/2 cup sliced onions 1/4 cup sliced olives 1/4 cup sliced mushrooms Fresh basil leaves (optional) Any other toppings of your choice Instructions Step 1: Prepare the Dough 1. Activate the Yeast: In a small bowl, mix the instant yeast, sugar, and warm water. Stir well and let it sit for about 510 minutes until the mixture becomes frothy. 2. Mix the Dough: In a large mixing bowl, combine the ragi flour, whole wheat flour, and salt. Add the activated yeast mixture and olive oil. Gradually add more warm water as needed to form a soft dough. 3. Knead the Dough: Transfer the dough onto a lightly floured surface and knead for about 810 minutes until the dough is smooth and elastic. 4. Let the Dough Rise: Place the dough in a greased bowl, cover it with a damp cloth, and let it rise in a warm place for about 1 hour, or until it has doubled in size. Step 2: Prepare the Pizza Sauce 1. Sauté the Garlic: In a small pan, heat the olive oil over medium heat. Add the minced garlic and sauté until it turns golden brown. 2. Cook the Sauce: Add the tomato puree, oregano, basil, salt, and pepper to the pan. Stir well and let the sauce simmer for about 1015 minutes until it thickens. Set aside to cool. Step 3: Assemble the Pizza 1. Preheat the Oven: Preheat your oven to 220°C (430°F). If using a pizza stone, place it in the oven while preheating. 2. Roll Out the Dough: Once the dough has risen, punch it down and knead it briefly. Divide the dough into two equal portions if making two small pizzas. Roll out each portion on a floured surface to your desired thickness. 3. Transfer to Baking Sheet: If you’re not using a pizza stone, transfer the rolledout dough to a greased baking sheet or pizza pan. 4. Add the Sauce and Toppings: Spread a generous amount of the prepared pizza sauce over the dough. Sprinkle the shredded mozzarella cheese evenly over the sauce. Add your preferred toppings like bell peppers, onions, olives, and mushrooms. Step 4: Bake the Pizza 1. Bake: Place the pizza in the preheated oven and bake for 1215 minutes, or until the crust is crisp and the cheese is melted and bubbly. 2. Finish and Serve: Once done, remove the pizza from the oven. Let it cool for a minute, then garnish with fresh basil leaves if desired. Slice and serve your delicious ragi flour pizza hot! Tips: For a Crispier Crust: Prebake the ragi flour crust for 57 minutes before adding the sauce and toppings. Dough Substitutions: If you prefer a 100% ragi crust, skip the whole wheat flour. However, the texture might be denser. Flavor Variations: Add some garlic powder, dried herbs, or chili flakes to the dough for extra flavor. Ragi Flour Pancake Recipe Ragi flour pancakes are a nutritious and delicious way to start your day. These glutenfree pancakes are packed with fiber, calcium, and other essential nutrients, making them a healthy alternative to traditional pancakes. Here’s how you can make them: Ingredients 1 cup ragi flour 1/4 cup whole wheat flour (optional for added texture) 2 tbsp sugar or honey (adjust to taste) 1/2 tsp baking powder 1/4 tsp baking soda 1/4 tsp cinnamon powder (optional) 1/4 tsp salt 1 cup milk (dairy or plantbased) 1 large egg (optional for added protein) 1 tsp vanilla extract 2 tbsp melted butter or oil (plus extra for cooking) Fresh fruits, nuts, or chocolate chips (optional toppings) Instructions Step 1: Prepare the Batter 1. Combine Dry Ingredients: In a large mixing bowl, sift together the ragi flour, whole wheat flour (if using), sugar, baking powder, baking soda, cinnamon powder (if using), and salt. 2. Mix Wet Ingredients: In another bowl, whisk together the milk, egg (if using), vanilla extract, and melted butter or oil. 3. Combine Wet and Dry Ingredients: Pour the wet ingredients into the dry ingredients. Mix until just combined, being careful not to overmix. The batter should be thick but pourable. If it’s too thick, add a little more milk to reach the desired consistency. Step 2: Cook the Pancakes 1. Heat the Pan: Heat a nonstick pan or griddle over medium heat. Lightly grease it with a small amount of butter or oil. 2. Pour the Batter: Once the pan is hot, pour about 1/4 cup of batter onto the pan for each pancake. Use the back of a spoon to spread the batter into a round shape. 3. Cook the Pancakes: Cook the pancakes for 23 minutes, or until bubbles start to form on the surface and the edges begin to set. Flip the pancake and cook for another 12 minutes, until both sides are golden brown. 4. Repeat: Continue this process with the remaining batter, greasing the pan as needed between batches. Step 3: Serve 1. Plate the Pancakes: Stack the pancakes on a plate and serve them warm. 2. Add Toppings: Top with your favorite fruits, nuts, or chocolate chips. Drizzle with honey, maple syrup, or a dollop of yogurt for extra flavor. Tips: Vegan Option: Substitute the egg with a flaxseed egg (1 tbsp ground flaxseed mixed with 3 tbsp water) and use plantbased milk. Extra Flavor: Add mashed bananas or grated apples to the batter for added natural sweetness and flavor. Storage: Leftover pancakes can be stored in the refrigerator for up to 2 days or frozen for longer storage. Reheat them in a toaster or microwave. Chocolate Ragi SugarFree Cookies Recipe These chocolate ragi sugarfree cookies are a healthy treat that satisfies your sweet tooth without the guilt. Made with nutrientrich ragi flour and sweetened with natural alternatives, they’re perfect for a snack or dessert. Ingredients 1 cup ragi flour 1/4 cup almond flour (optional for added richness) 1/4 cup unsweetened cocoa powder 1/2 tsp baking soda 1/4 tsp salt 1/4 cup coconut oil or butter, melted 1/4 cup unsweetened applesauce or mashed banana (for natural sweetness) 1/4 cup erythritol or stevia (or sweetener of your choice, adjust to taste) 1 tsp vanilla extract 1/4 cup dark chocolate chips (sugarfree) 23 tbsp milk (dairy or plantbased) Instructions Step 1: Prepare the Dough 1. Preheat the Oven: Preheat your oven to 350°F (175°C). Line a baking sheet with parchment paper or a silicone baking mat. 2. Combine Dry Ingredients: In a large mixing bowl, sift together the ragi flour, almond flour (if using), cocoa powder, baking soda, and salt. 3. Mix Wet Ingredients: In another bowl, whisk together the melted coconut oil or butter, unsweetened applesauce or mashed banana, sweetener, and vanilla extract. 4. Combine Wet and Dry Ingredients: Gradually add the wet ingredients to the dry ingredients. Mix until well combined. If the dough is too dry, add 23 tablespoons of milk to bring it together. Fold in the dark chocolate chips. Step 2: Shape and Bake the Cookies 1. Shape the Cookies: Using a spoon or your hands, scoop out small portions of the dough and roll them into balls. Place the balls onto the prepared baking sheet and flatten them slightly with your fingers or the back of a spoon. 2. Bake: Bake the cookies in the preheated oven for 1012 minutes, or until the edges are set. The cookies will still be soft in the center but will firm up as they cool. 3. Cool: Remove the baking sheet from the oven and let the cookies cool on the sheet for 5 minutes before transferring them to a wire rack to cool completely. Step 3: Serve 1. Enjoy: Once cooled, enjoy your chocolate ragi sugarfree cookies with a cup of tea, coffee, or a glass of milk. Tips: Storage: Store the cookies in an airtight container at room temperature for up to a week or freeze for longer storage. Sweetener Substitutes: You can experiment with different natural sweeteners like monk fruit sweetener or xylitol based on your preference. AddIns: Feel free to add nuts, seeds, or dried fruits to the dough for extra texture and flavor. Health Benefits Incorporating ragi flour into your diet can offer numerous health benefits. Its high fiber content aids in digestion, prevents constipation, and promotes a healthy gut. The slow release of glucose into the bloodstream makes it an excellent choice for people with diabetes, as it helps in managing blood sugar levels. Ragi is also known for its role in weight management. The fiber and complex carbohydrates in ragi provide a sense of fullness, reducing overall calorie intake. This makes it an ideal food for those looking to lose weight or maintain a healthy weight. Furthermore, the antioxidants in ragi, such as polyphenols and flavonoids, help combat oxidative stress, reducing the risk of chronic diseases like heart disease and cancer. The iron content in ragi also boosts hemoglobin levels, preventing anemia and improving overall energy levels. Conclusion Ragi flour is more than just a grain; it’s a nutritional powerhouse that offers a multitude of health benefits. Whether you’re looking to boost your calcium intake, manage your weight, or simply add a healthy and versatile ingredient to your cooking, ragi flour is an excellent choice. Its rich history, coupled with its growing popularity in modern kitchens, makes ragi flour a timeless addition to a healthy diet. So, the next time you’re in the grocery store, consider picking up some ragi flour and exploring the many ways it can enrich your meals and your health. Ragi flour can also be used in baking, offering a nutritious alternative to wheat flour. It adds a slightly nutty flavor to breads, muffins, cookies, and cakes. In fact, mixing ragi flour with other flours like wheat or oat flour can enhance the nutritional value of your baked goods without compromising taste or texture. For those interested in trying something new, ragi flour can be used to make pasta, noodles, and even pancakes. Its earthy flavor pairs well with both sweet and savory dishes, making it a versatile ingredient in any kitchen. Ragi Flour: A NutrientPacked Ancient Grain for Modern Health Ragi flour, also known as finger millet flour, is an ancient grain that has been a staple in traditional diets, particularly in India and Africa, for thousands of years. This humble grain is making a comeback in modern kitchens, thanks to its impressive nutritional profile and versatility in cooking. As more people seek healthier and more sustainable food options, ragi flour is emerging as a superfood that deserves a place in your pantry. Nutritional Powerhouse Ragi flour is celebrated for its high nutritional content. It is rich in essential nutrients like calcium, iron, protein, and dietary fiber. One of the most significant benefits of ragi is its high calcium content, making it an excellent option for maintaining bone health, especially for those who are lactose intolerant or prefer plantbased diets. In fact, ragi contains more calcium than most other grains, making it a valuable food for children, pregnant women, and the elderly. In addition to calcium, ragi is packed with iron, which is crucial for preventing anemia and maintaining healthy blood levels. The grain is also a good source of protein, which is essential for muscle repair and overall growth, especially for vegetarians who may struggle to meet their protein needs through diet alone. Ragi flour is also glutenfree, making it a great alternative for those with gluten intolerance or celiac disease. Its high fiber content aids in digestion, promotes a feeling of fullness, and helps in managing weight. The slowdigesting carbohydrates in ragi make it a great choice for diabetics as it helps regulate blood sugar levels, preventing spikes after meals. Culinary Versatility One of the reasons ragi flour is gaining popularity is its versatility in cooking. It can be used in a wide range of dishes, from traditional recipes to modern creations. In India, ragi is often used to make rotis (flatbreads), dosas (savory pancakes), and porridge. Ragi porridge, known as ragi malt, is a popular breakfast option, especially for babies and young children, due to its easy digestibility and high nutrient content. Ragi Flour Pizza Recipe Ragi flour, or finger millet flour, is a nutritious alternative to traditional wheat flour, and it can be used to make a delicious and healthy pizza. Here’s a stepbystep guide to making a ragi flour pizza from scratch. Ingredients For the Pizza Dough: 1 cup ragi flour 1/2 cup whole wheat flour (optional for added texture) 1 tsp instant yeast 1 tsp sugar 1/2 tsp salt 1 tbsp olive oil 1/2 cup warm water (adjust as needed) For the Pizza Sauce: 1/2 cup tomato puree 1 garlic clove, minced 1 tsp olive oil 1/2 tsp dried oregano 1/2 tsp dried basil Salt and pepper to taste For the Toppings: 1 cup mozzarella cheese (or any preferred cheese) 1/2 cup sliced bell peppers 1/2 cup sliced onions 1/4 cup sliced olives 1/4 cup sliced mushrooms Fresh basil leaves (optional) Any other toppings of your choice Instructions Step 1: Prepare the Dough 1. Activate the Yeast: In a small bowl, mix the instant yeast, sugar, and warm water. Stir well and let it sit for about 510 minutes until the mixture becomes frothy. 2. Mix the Dough: In a large mixing bowl, combine the ragi flour, whole wheat flour, and salt. Add the activated yeast mixture and olive oil. Gradually add more warm water as needed to form a soft dough. 3. Knead the Dough: Transfer the dough onto a lightly floured surface and knead for about 810 minutes until the dough is smooth and elastic. 4. Let the Dough Rise: Place the dough in a greased bowl, cover it with a damp cloth, and let it rise in a warm place for about 1 hour, or until it has doubled in size. Step 2: Prepare the Pizza Sauce 1. Sauté the Garlic: In a small pan, heat the olive oil over medium heat. Add the minced garlic and sauté until it turns golden brown. 2. Cook the Sauce: Add the tomato puree, oregano, basil, salt, and pepper to the pan. Stir well and let the sauce simmer for about 1015 minutes until it thickens. Set aside to cool. Step 3: Assemble the Pizza 1. Preheat the Oven: Preheat your oven to 220°C (430°F). If using a pizza stone, place it in the oven while preheating. 2. Roll Out the Dough: Once the dough has risen, punch it down and knead it briefly. Divide the dough into two equal portions if making two small pizzas. Roll out each portion on a floured surface to your desired thickness. 3. Transfer to Baking Sheet: If you’re not using a pizza stone, transfer the rolledout dough to a greased baking sheet or pizza pan. 4. Add the Sauce and Toppings: Spread a generous amount of the prepared pizza sauce over the dough. Sprinkle the shredded mozzarella cheese evenly over the sauce. Add your preferred toppings like bell peppers, onions, olives, and mushrooms. Step 4: Bake the Pizza 1. Bake: Place the pizza in the preheated oven and bake for 1215 minutes, or until the crust is crisp and the cheese is melted and bubbly. 2. Finish and Serve: Once done, remove the pizza from the oven. Let it cool for a minute, then garnish with fresh basil leaves if desired. Slice and serve your delicious ragi flour pizza hot! Tips: For a Crispier Crust: Prebake the ragi flour crust for 57 minutes before adding the sauce and toppings. Dough Substitutions: If you prefer a 100% ragi crust, skip the whole wheat flour. However, the texture might be denser. Flavor Variations: Add some garlic powder, dried herbs, or chili flakes to the dough for extra flavor. Ragi Flour Pancake Recipe Ragi flour pancakes are a nutritious and delicious way to start your day. These glutenfree pancakes are packed with fiber, calcium, and other essential nutrients, making them a healthy alternative to traditional pancakes. Here’s how you can make them: Ingredients 1 cup ragi flour 1/4 cup whole wheat flour (optional for added texture) 2 tbsp sugar or honey (adjust to taste) 1/2 tsp baking powder 1/4 tsp baking soda 1/4 tsp cinnamon powder (optional) 1/4 tsp salt 1 cup milk (dairy or plantbased) 1 large egg (optional for added protein) 1 tsp vanilla extract 2 tbsp melted butter or oil (plus extra for cooking) Fresh fruits, nuts, or chocolate chips (optional toppings) Instructions Step 1: Prepare the Batter 1. Combine Dry Ingredients: In a large mixing bowl, sift together the ragi flour, whole wheat flour (if using), sugar, baking powder, baking soda, cinnamon powder (if using), and salt. 2. Mix Wet Ingredients: In another bowl, whisk together the milk, egg (if using), vanilla extract, and melted butter or oil. 3. Combine Wet and Dry Ingredients: Pour the wet ingredients into the dry ingredients. Mix until just combined, being careful not to overmix. The batter should be thick but pourable. If it’s too thick, add a little more milk to reach the desired consistency. Step 2: Cook the Pancakes 1. Heat the Pan: Heat a nonstick pan or griddle over medium heat. Lightly grease it with a small amount of butter or oil. 2. Pour the Batter: Once the pan is hot, pour about 1/4 cup of batter onto the pan for each pancake. Use the back of a spoon to spread the batter into a round shape. 3. Cook the Pancakes: Cook the pancakes for 23 minutes, or until bubbles start to form on the surface and the edges begin to set. Flip the pancake and cook for another 12 minutes, until both sides are golden brown. 4. Repeat: Continue this process with the remaining batter, greasing the pan as needed between batches. Step 3: Serve 1. Plate the Pancakes: Stack the pancakes on a plate and serve them warm. 2. Add Toppings: Top with your favorite fruits, nuts, or chocolate chips. Drizzle with honey, maple syrup, or a dollop of yogurt for extra flavor. Tips: Vegan Option: Substitute the egg with a flaxseed egg (1 tbsp ground flaxseed mixed with 3 tbsp water) and use plantbased milk. Extra Flavor: Add mashed bananas or grated apples to the batter for added natural sweetness and flavor. Storage: Leftover pancakes can be stored in the refrigerator for up to 2 days or frozen for longer storage. Reheat them in a toaster or microwave. Chocolate Ragi SugarFree Cookies Recipe These chocolate ragi sugarfree cookies are a healthy treat that satisfies your sweet tooth without the guilt. Made with nutrientrich ragi flour and sweetened with natural alternatives, they’re perfect for a snack or dessert. Ingredients 1 cup ragi flour 1/4 cup almond flour (optional for added richness) 1/4 cup unsweetened cocoa powder 1/2 tsp baking soda 1/4 tsp salt 1/4 cup coconut oil or butter, melted 1/4 cup unsweetened applesauce or mashed banana (for natural sweetness) 1/4 cup erythritol or stevia (or sweetener of your choice, adjust to taste) 1 tsp vanilla extract 1/4 cup dark chocolate chips (sugarfree) 23 tbsp milk (dairy or plantbased) Instructions Step 1: Prepare the Dough 1. Preheat the Oven: Preheat your oven to 350°F (175°C). Line a baking sheet with parchment paper or a silicone baking mat. 2. Combine Dry Ingredients: In a large mixing bowl, sift together the ragi flour, almond flour (if using), cocoa powder, baking soda, and salt. 3. Mix Wet Ingredients: In another bowl, whisk together the melted coconut oil or butter, unsweetened applesauce or mashed banana, sweetener, and vanilla extract. 4. Combine Wet and Dry Ingredients: Gradually add the wet ingredients to the dry ingredients. Mix until well combined. If the dough is too dry, add 23 tablespoons of milk to bring it together. Fold in the dark chocolate chips. Step 2: Shape and Bake the Cookies 1. Shape the Cookies: Using a spoon or your hands, scoop out small portions of the dough and roll them into balls. Place the balls onto the prepared baking sheet and flatten them slightly with your fingers or the back of a spoon. 2. Bake: Bake the cookies in the preheated oven for 1012 minutes, or until the edges are set. The cookies will still be soft in the center but will firm up as they cool. 3. Cool: Remove the baking sheet from the oven and let the cookies cool on the sheet for 5 minutes before transferring them to a wire rack to cool completely. Step 3: Serve 1. Enjoy: Once cooled, enjoy your chocolate ragi sugarfree cookies with a cup of tea, coffee, or a glass of milk. Tips: Storage: Store the cookies in an airtight container at room temperature for up to a week or freeze for longer storage. Sweetener Substitutes: You can experiment with different natural sweeteners like monk fruit sweetener or xylitol based on your preference. AddIns: Feel free to add nuts, seeds, or dried fruits to the dough for extra texture and flavor. Health Benefits Incorporating ragi flour into your diet can offer numerous health benefits. Its high fiber content aids in digestion, prevents constipation, and promotes a healthy gut. The slow release of glucose into the bloodstream makes it an excellent choice for people with diabetes, as it helps in managing blood sugar levels. Ragi is also known for its role in weight management. The fiber and complex carbohydrates in ragi provide a sense of fullness, reducing overall calorie intake. This makes it an ideal food for those looking to lose weight or maintain a healthy weight. Furthermore, the antioxidants in ragi, such as polyphenols and flavonoids, help combat oxidative stress, reducing the risk of chronic diseases like heart disease and cancer. The iron content in ragi also boosts hemoglobin levels, preventing anemia and improving overall energy levels. Conclusion Ragi flour is more than just a grain; it’s a nutritional powerhouse that offers a multitude of health benefits. Whether you’re looking to boost your calcium intake, manage your weight, or simply add a healthy and versatile ingredient to your cooking, ragi flour is an excellent choice. Its rich history, coupled with its growing popularity in modern kitchens, makes ragi flour a timeless addition to a healthy diet. So, the next time you’re in the grocery store, consider picking up some ragi flour and exploring the many ways it can enrich your meals and your health. Ragi flour can also be used in baking, offering a nutritious alternative to wheat flour. It adds a slightly nutty flavor to breads, muffins, cookies, and cakes. In fact, mixing ragi flour with other flours like wheat or oat flour can enhance the nutritional value of your baked goods without compromising taste or texture. For those interested in trying something new, ragi flour can be used to make pasta, noodles, and even pancakes. Its earthy flavor pairs well with both sweet and savory dishes, making it a versatile ingredient in any kitchen. Ragi Flour
Ragi Flour: A Nutrient Packed Ancient Grain for Modern Health

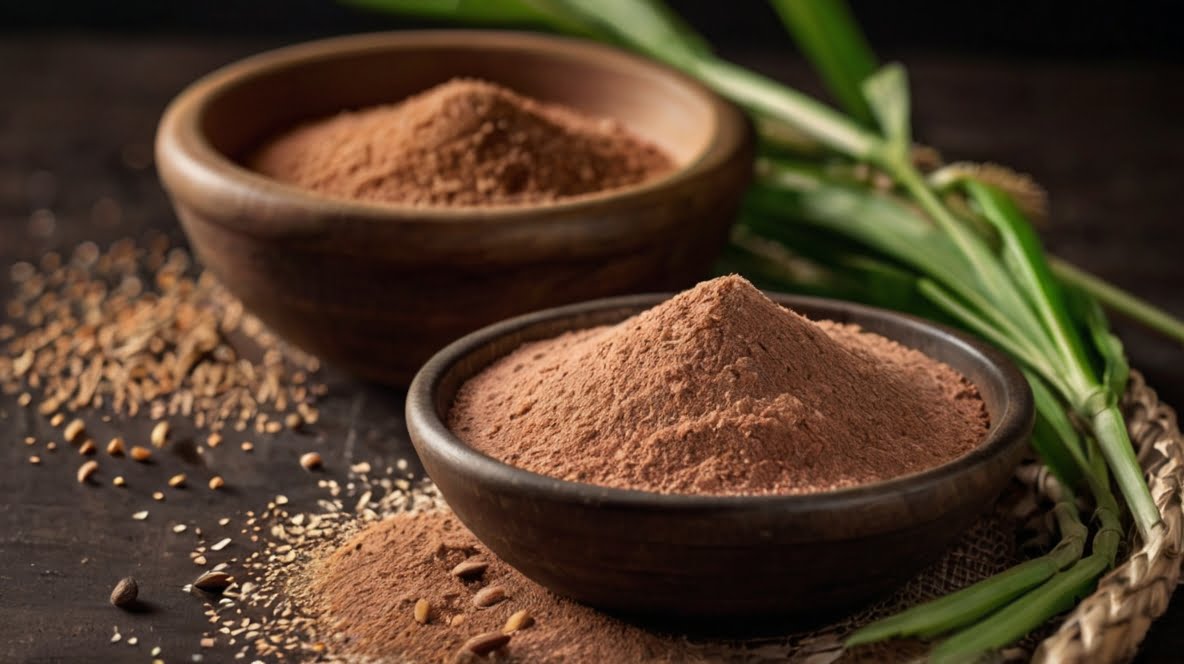
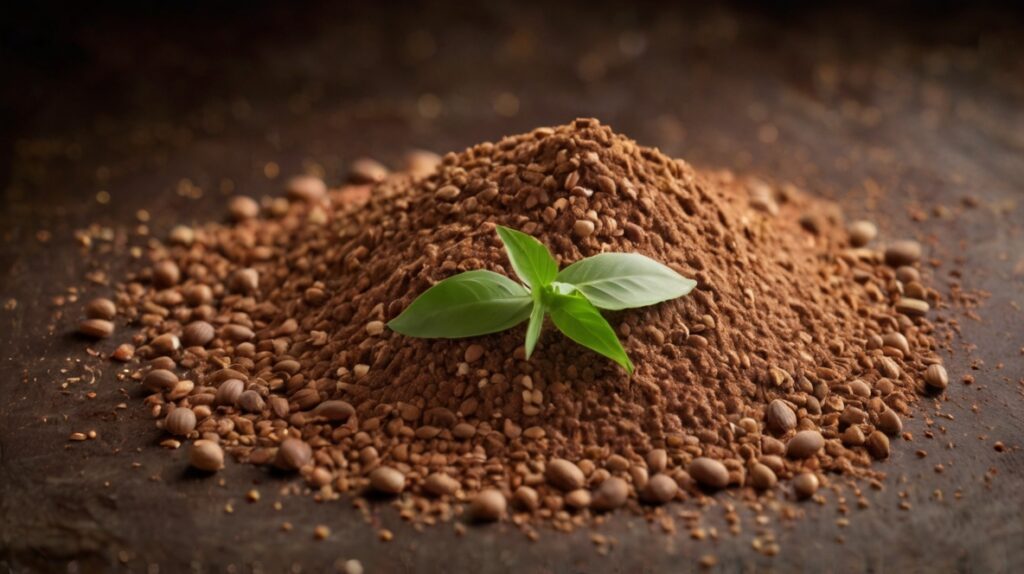
Ragi flour, also known as finger millet flour, is an ancient grain that has been a staple in traditional diets, particularly in India and Africa, for thousands of years. This humble grain is making a comeback in modern kitchens, thanks to its impressive nutritional profile and versatility in cooking. As more people seek healthier and more sustainable food options, ragi flour is emerging as a superfood that deserves a place in your pantry.

Nutritional Powerhouse

Ragi Flour
Ragi Flour

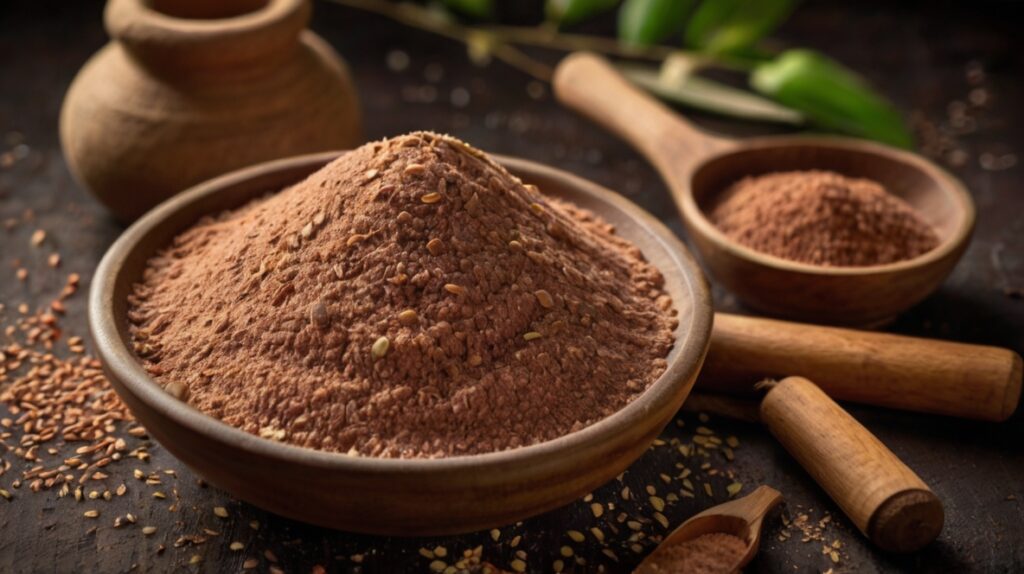
Ragi flour is celebrated for its high nutritional content. It is rich in essential nutrients like calcium, iron, protein, and dietary fiber. One of the most significant benefits of ragi is its high calcium content, making it an excellent option for maintaining bone health, especially for those who are lactose intolerant or prefer plantbased diets. In fact, ragi contains more calcium than most other grains, making it a valuable food for children, pregnant women, and the elderly.

In addition to calcium, ragi is packed with iron, which is crucial for preventing anemia and maintaining healthy blood levels. The grain is also a good source of protein, which is essential for muscle repair and overall growth, especially for vegetarians who may struggle to meet their protein needs through diet alone.

Ragi flour is also glutenfree, making it a great alternative for those with gluten intolerance or celiac disease. Its high fiber content aids in digestion, promotes a feeling of fullness, and helps in managing weight. The slowdigesting carbohydrates in ragi make it a great choice for diabetics as it helps regulate blood sugar levels, preventing spikes after meals.

Culinary Versatility

One of the reasons ragi flour is gaining popularity is its versatility in cooking. It can be used in a wide range of dishes, from traditional recipes to modern creations. In India, ragi is often used to make rotis (flatbreads), dosas (savory pancakes), and porridge. Ragi porridge, known as ragi malt, is a popular breakfast option, especially for babies and young children, due to its easy digestibility and high nutrient content.

Ragi Flour Pizza Recipe

Ragi Flour Pizza
Ragi Flour Pizza

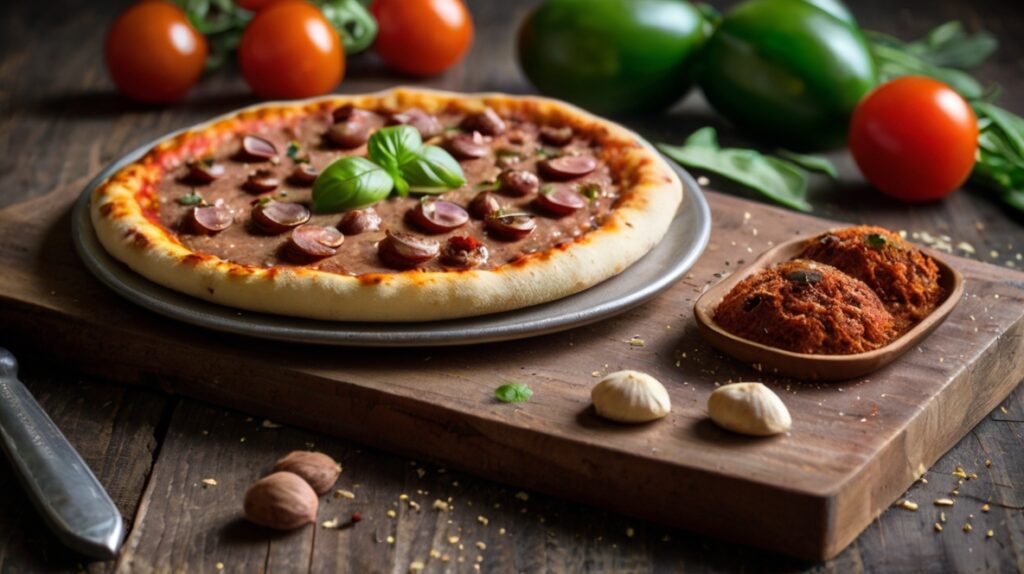
Ragi flour, or finger millet flour, is a nutritious alternative to traditional wheat flour, and it can be used to make a delicious and healthy pizza. Here’s a stepbystep guide to making a ragi flour pizza from scratch.

 Ingredients

  • For the Pizza Dough:
  •  1 cup ragi flour
  •  1/2 cup whole wheat flour (optional for added texture)
  •  1 tsp instant yeast
  •  1 tsp sugar
  •  1/2 tsp salt
  •  1 tbsp olive oil
  •  1/2 cup warm water (adjust as needed)
  • For the Pizza Sauce:
  •  1/2 cup tomato puree
  •  1 garlic clove, minced
  •  1 tsp olive oil
  •  1/2 tsp dried oregano
  •  1/2 tsp dried basil
  •  Salt and pepper to taste

For the Toppings:

  •  1 cup mozzarella cheese (or any preferred cheese)
  •  1/2 cup sliced bell peppers
  •  1/2 cup sliced onions
  •  1/4 cup sliced olives
  •  1/4 cup sliced mushrooms
  •  Fresh basil leaves (optional)
  •  Any other toppings of your choice

 Instructions

Step 1: Prepare the Dough

  • Activate the Yeast: In a small bowl, mix the instant yeast, sugar, and warm water. Stir well and let it sit for about 510 minutes until the mixture becomes frothy.
  • Mix the Dough: In a large mixing bowl, combine the ragi flour, whole wheat flour, and salt. Add the activated yeast mixture and olive oil. Gradually add more warm water as needed to form a soft dough.
  • Knead the Dough: Transfer the dough onto a lightly floured surface and knead for about 810 minutes until the dough is smooth and elastic.
  • Let the Dough Rise: Place the dough in a greased bowl, cover it with a damp cloth, and let it rise in a warm place for about 1 hour, or until it has doubled in size.

Step 2: Prepare the Pizza Sauce

  • Sauté the Garlic: In a small pan, heat the olive oil over medium heat. Add the minced garlic and sauté until it turns golden brown.
  • Cook the Sauce: Add the tomato puree, oregano, basil, salt, and pepper to the pan. Stir well and let the sauce simmer for about 1015 minutes until it thickens. Set aside to cool.

Step 3: Assemble the Pizza

  • Preheat the Oven: Preheat your oven to 220°C (430°F). If using a pizza stone, place it in the oven while preheating.
  • Roll Out the Dough: Once the dough has risen, punch it down and knead it briefly. Divide the dough into two equal portions if making two small pizzas. Roll out each portion on a floured surface to your desired thickness.
  • Transfer to Baking Sheet: If you’re not using a pizza stone, transfer the rolledout dough to a greased baking sheet or pizza pan.
  • Add the Sauce and Toppings: Spread a generous amount of the prepared pizza sauce over the dough. Sprinkle the shredded mozzarella cheese evenly over the sauce. Add your preferred toppings like bell peppers, onions, olives, and mushrooms.

Step 4: Bake the Pizza

  • Bake: Place the pizza in the preheated oven and bake for 1215 minutes, or until the crust is crisp and the cheese is melted and bubbly.
  • Finish and Serve: Once done, remove the pizza from the oven. Let it cool for a minute, then garnish with fresh basil leaves if desired. Slice and serve your delicious ragi flour pizza hot!

 Tips:

  •  For a Crispier Crust: Prebake the ragi flour crust for 57 minutes before adding the sauce and toppings.
  •  Dough Substitutions: If you prefer a 100% ragi crust, skip the whole wheat flour. However, the texture might be denser.
  •  Flavor Variations: Add some garlic powder, dried herbs, or chili flakes to the dough for extra flavor.

 Ragi Flour Pancake Recipe

 Ragi Flour Pancake
 Ragi Flour Pancake

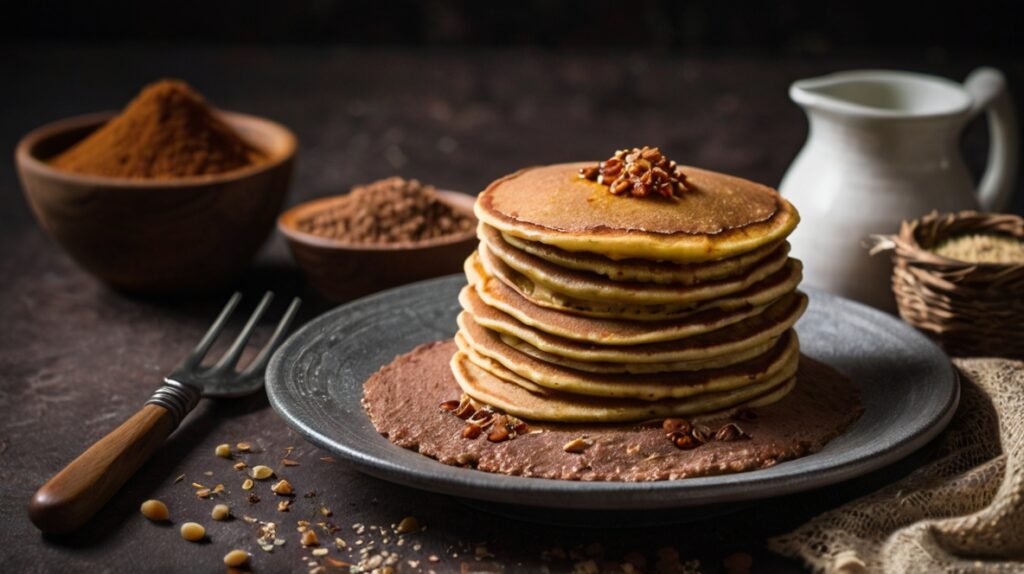
Ragi flour pancakes are a nutritious and delicious way to start your day. These glutenfree pancakes are packed with fiber, calcium, and other essential nutrients, making them a healthy alternative to traditional pancakes. Here’s how you can make them:

 Ingredients

  •  1 cup ragi flour
  •  1/4 cup whole wheat flour (optional for added texture)
  •  2 tbsp sugar or honey (adjust to taste)
  •  1/2 tsp baking powder
  •  1/4 tsp baking soda
  •  1/4 tsp cinnamon powder (optional)
  •  1/4 tsp salt
  •  1 cup milk (dairy or plantbased)
  •  1 large egg (optional for added protein)
  •  1 tsp vanilla extract
  •  2 tbsp melted butter or oil (plus extra for cooking)
  •  Fresh fruits, nuts, or chocolate chips (optional toppings)

 Instructions

Step 1: Prepare the Batter

  • Combine Dry Ingredients: In a large mixing bowl, sift together the ragi flour, whole wheat flour (if using), sugar, baking powder, baking soda, cinnamon powder (if using), and salt.
  • Mix Wet Ingredients: In another bowl, whisk together the milk, egg (if using), vanilla extract, and melted butter or oil.
  • Combine Wet and Dry Ingredients: Pour the wet ingredients into the dry ingredients. Mix until just combined, being careful not to overmix. The batter should be thick but pourable. If it’s too thick, add a little more milk to reach the desired consistency.

Step 2: Cook the Pancakes

  • Heat the Pan: Heat a nonstick pan or griddle over medium heat. Lightly grease it with a small amount of butter or oil.
  • Pour the Batter: Once the pan is hot, pour about 1/4 cup of batter onto the pan for each pancake. Use the back of a spoon to spread the batter into a round shape.
  • Cook the Pancakes: Cook the pancakes for 23 minutes, or until bubbles start to form on the surface and the edges begin to set. Flip the pancake and cook for another 12 minutes, until both sides are golden brown.

Repeat: Continue this process with the remaining batter, greasing the pan as needed between batches.

Step 3: Serve

  • Plate the Pancakes: Stack the pancakes on a plate and serve them warm.
  • Add Toppings: Top with your favorite fruits, nuts, or chocolate chips. Drizzle with honey, maple syrup, or a dollop of yogurt for extra flavor.

 Tips:

 Vegan Option: Substitute the egg with a flaxseed egg (1 tbsp ground flaxseed mixed with 3 tbsp water) and use plantbased milk.

 Extra Flavor: Add mashed bananas or grated apples to the batter for added natural sweetness and flavor.

 Storage: Leftover pancakes can be stored in the refrigerator for up to 2 days or frozen for longer storage. Reheat them in a toaster or microwave.

Chocolate Ragi SugarFree Cookies Recipe

Chocolate Ragi SugarFree Cookies

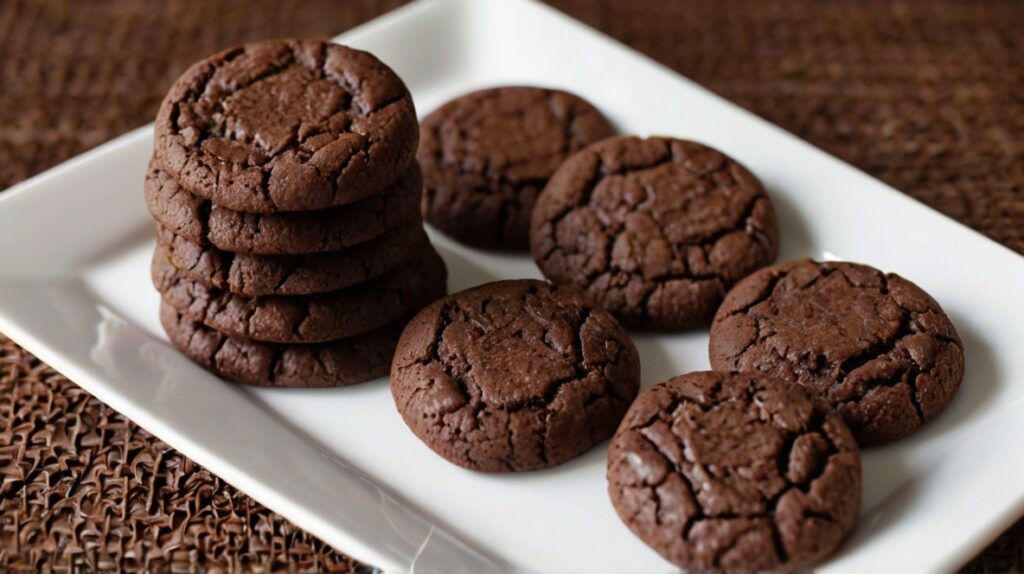
These chocolate ragi Sugar free cookies are a healthy treat that satisfies your sweet tooth without the guilt. Made with nutrientrich ragi flour and sweetened with natural alternatives, they’re perfect for a snack or dessert.

 Ingredients

  •  1 cup ragi flour
  •  1/4 cup almond flour (optional for added richness)
  •  1/4 cup unsweetened cocoa powder
  •  1/2 tsp baking soda
  •  1/4 tsp salt
  •  1/4 cup coconut oil or butter, melted
  •  1/4 cup unsweetened applesauce or mashed banana (for natural sweetness)
  •  1/4 cup erythritol or stevia (or sweetener of your choice, adjust to taste)
  •  1 tsp vanilla extract
  •  1/4 cup dark chocolate chips (sugarfree)
  •  23 tbsp milk (dairy or plantbased)

 Instructions

Step 1: Prepare the Dough

  • Preheat the Oven: Preheat your oven to 350°F (175°C). Line a baking sheet with parchment paper or a silicone baking mat.
  • Combine Dry Ingredients: In a large mixing bowl, sift together the ragi flour, almond flour (if using), cocoa powder, baking soda, and salt.
  • Mix Wet Ingredients: In another bowl, whisk together the melted coconut oil or butter, unsweetened applesauce or mashed banana, sweetener, and vanilla extract.
  • Combine Wet and Dry Ingredients: Gradually add the wet ingredients to the dry ingredients. Mix until well combined. If the dough is too dry, add 23 tablespoons of milk to bring it together. Fold in the dark chocolate chips.

Step 2: Shape and Bake the Cookies

  • Shape the Cookies: Using a spoon or your hands, scoop out small portions of the dough and roll them into balls. Place the balls onto the prepared baking sheet and flatten them slightly with your fingers or the back of a spoon.
  • Bake: Bake the cookies in the preheated oven for 1012 minutes, or until the edges are set. The cookies will still be soft in the center but will firm up as they cool.
  • Cool: Remove the baking sheet from the oven and let the cookies cool on the sheet for 5 minutes before transferring them to a wire rack to cool completely.

Step 3: Serve

Enjoy: Once cooled, enjoy your chocolate ragi sugarfree cookies with a cup of tea, coffee, or a glass of milk.

 Tips:

 Storage: Store the cookies in an airtight container at room temperature for up to a week or freeze for longer storage.

 Sweetener Substitutes: You can experiment with different natural sweeteners like monk fruit sweetener or xylitol based on your preference.

 AddIns: Feel free to add nuts, seeds, or dried fruits to the dough for extra texture and flavor.

Health Benefits

Ragi Flour 3
Ragi Flour 3

Incorporating ragi flour into your diet can offer numerous health benefits. Its high fiber content aids in digestion, prevents constipation, and promotes a healthy gut. The slow release of glucose into the bloodstream makes it an excellent choice for people with diabetes, as it helps in managing blood sugar levels.

Ragi is also known for its role in weight management. The fiber and complex carbohydrates in ragi provide a sense of fullness, reducing overall calorie intake. This makes it an ideal food for those looking to lose weight or maintain a healthy weight.

Furthermore, the antioxidants in ragi, such as polyphenols and flavonoids, help combat oxidative stress, reducing the risk of chronic diseases like heart disease and cancer. The iron content in ragi also boosts hemoglobin levels, preventing anemia and improving overall energy levels.

Conclusion

Ragi flour is more than just a grain; it’s a nutritional powerhouse that offers a multitude of health benefits. Whether you’re looking to boost your calcium intake, manage your weight, or simply add a healthy and versatile ingredient to your cooking, ragi flour is an excellent choice. Its rich history, coupled with its growing popularity in modern kitchens, makes ragi flour a timeless addition to a healthy diet. So, the next time you’re in the grocery store, consider picking up some ragi flour and exploring the many ways it can enrich your meals and your health.

Ragi flour can also be used in baking, offering a nutritious alternative to wheat flour. It adds a slightly nutty flavor to breads, muffins, cookies, and cakes. In fact, mixing ragi flour with other flours like wheat or oat flour can enhance the nutritional value of your baked goods without compromising taste or texture.

For those interested in trying something new, ragi flour can be used to make pasta, noodles, and even pancakes. Its earthy flavor pairs well with both sweet and savory dishes, making it a versatile ingredient in any kitchen.

This Post Has 8 Comments

  1. Avatar of droversointeru
    droversointeru

    After all, what a great site and informative posts, I will upload inbound link – bookmark this web site? Regards, Reader.

    1. Avatar of Humaid
      Humaid

      Thank you for the positive feedback! I’m glad you found the site informative. I appreciate you considering bookmarking it—your support means a lot! If you have any questions or topics you’d like to see covered, feel free to reach out. Regards!

  2. Avatar of crie uma conta na binance
    crie uma conta na binance

    Thank you for your sharing. I am worried that I lack creative ideas. It is your article that makes me full of hope. Thank you. But, I have a question, can you help me?

  3. Avatar of www.binance.com sign up
    www.binance.com sign up

    I don’t think the title of your article matches the content lol. Just kidding, mainly because I had some doubts after reading the article.

  4. Avatar of binance kods
    binance kods

    Thanks for sharing. I read many of your blog posts, cool, your blog is very good.

Leave a Reply